Back bends is something that I did not enjoy (and still do not enjoy) during yoga classes simply because it wasn’t happening and matter of factly, it didn’t feel good.
Why do we need flexible backs?
I often hear this phrase “You Are As Old As Your Spine” and it makes sense. Without conscious effort to maintain flexibility, people just gets stiffer as they age and movement gets restricted. With a smaller range of movement, injury happens more easily and these things only happen to old people, not children. You don’t hear children whining about back aches. I believe keeping the spine flexibility is beneficial to everyone, not just yoga practitioners. It is a way to keep the body youthful and useful.
Firstly, I would say my back has been very normal all my life. I do not have any abnormalities in my spine and my posture has been average. The average human tends to slouch a little and that’s the natural shape of the spine. Anatomically, our spine is a natural S shape looking from the side – your thoracic region (ribs) round a little while your lumbar region (lower back) arches in. In fact, those who has been walking and sitting up a very upright spine all their lives have actually been doing back bends unknowingly! The “correct” posture of straightening the thoracic spine which started off rounded in is already backbending. As you do this, the lumbar spine bends back as well since it’s all connected. This small correction in posture actually helps keep the spine flexible and is very beneficial in future.
Here’s what to know about attempting back bends, and information to those who are afraid of trying:
1. What is back bend?
You think you know, I thought I knew, but it isn’t so simple! After my course about spine anatomy with Jo Phee, I learnt that only our lumbar spine and neck literally bends backwards. The thoracic spine will not go beyond straight because we have ribs. But this does not mean we will let all the work happen in the lumbar! Many people who are unfamiliar with yoga do not understand that backbends also involves chest opening and flexible yet strong quads and hip flexors and not simply just bending the vertebrae.
Chest
In order to allow your body to seemingly bend more, we need to bring our shoulder blades together and this action is chest opening – our muscles of the front body gets stretched while the muscle between our shoulder blades (rhomboids) gets squeezed.
Prep pose: Prasarita Padotanasana C, matsyasana (fish pose)
Shoulders
For poses involving the arms, shoulder flexibility of the flexion movement (shoulder has 5 movements), which means raising your arm up, is very important. The muscles below the armpits will get stretched here and this allows your arms to go back further.
Prep pose: Extended puppy
Thighs
The legs will be involved because you need strong thighs to ground yourself down while the rest of your body bends backwards. Otherwise you’ll just collapse.
Prep pose: Chair, warrior, lunges, bridge pose
Lower back
This is region where most literal bending happens. For lumbar flexibility, it is something we are born with. This cannot be made. It depends on how much space is there between your vertebrae and you can’t change it. Some people have naturally more space and some do not. This is why some of the super deep backbends will only happen for a selected few and not everyone will be able to achieve the same extent even if we practice a lifetime. What we can change are only the strength and flexibility of the other regions.
Neck
The cervical spine is also capable of bending backwards but again, the ability to do so is born not made. If you can, you can. Do not hurt the neck by trying to exceed your limitations due to skeletal structure. For poses with head hanging down, like Camel or Wheel, you should allow the head to hang and bend the neck backwards as much as you can, not resist gravity. Keeping the neck straight on purpose will only build undesirable muscles and tightness in the neck and shoulders. I learnt the hard way.
The neck can really make the overall backbend very different, especially for poses like King Cobra or King Pigeon where foot needs to touch the head. A good extension of cervical spine can help achieve that.
That said, two different people with toes touching the head may have achieved it via different methods. Everybody’s body is different, so we do not judge how much a person is stretched based on the overall looks. Some people could have done it without even stretching a muscle and that means they should aim for something deeper to open up the target areas!
The ultimate backbend which exhibits all these factors working in synergy will be the Wheel Pose. I have explained more about it here.
2. Start Young
Children have way more flexibility than adults and this was evident from a little girl I saw in class (she looks at most 9 yr old) who easily bends in all shapes. Her sister (around 13) could not and was as stiff as any other newcomer to yoga. However, comparing to adults, the 13 yr old definitely has better chance of achieving flexibility (in back, hips, hamstrings etc) than an older person who from the same starting point.
I’m glad I started yoga before I got too old. I have peers my age complaining about backaches so this is very true. You don’t want to wait till you lose the ability to move as freely as a younger person (example, picking something up from the floor with ease) to regret not attaining flexibility. Still, it is better to start as young as possible because the path would be much easier that way. There’s no harm anyway. Simple things like insisting on keeping an upright posture will help.
3. Breathe
As the back bends, the chest opens and here I feel my chest being ripped apart and breathing becomes harder than it should be for a basic human. Back bends and chest openers will restrict breathing so it’s important to consciously take longer, good quality breaths as we allow our muscles of the chest to stretch.
4. Be Patient
Unlike strength and core, flexibility in the spine, shoulders, and openness in the chest isn’t something that builds up with sheer determination and hard work. It’s a different kind of pain. For arms and legs, you have to endure and push yourself when you’re all wobbly. For back bends, if you can’t do it, you can only back off and continue trying. Slowly and gradually, the spine should get more flexible bit by bit. It is dangerous to “force” it like you would for building muscles in poses like arm balances and inversions. Everybody has a different back and starting point so you do not compare your progress with anyone.
5. Be Mindful
I’ve been doing yoga for more than 3 years and my progress for back bends isn’t impressive, but I am satisfied and will continue working on it. For those who are not bendy to begin with, you must always be mindful of protecting the lower back by engaging your legs and your opening your chest and shoulders. This is very important because injuries may happen otherwise when people get too eager and impatient. The spine is not something you can easily fix and injuries happen if you repeatedly do it the dangerous way. Start bending from the upper back by opening your chest outwards (somewhat like actively keeping a straight posture) –
When the shoulders and chest are flexible and legs are stable, we can control to not crush in the lower back though it may seem tempting because it looks as if you’re bending more – this is dangerous. Most of the time people progress in their backbend practice from gaining more open shoulders and chest, rather than bending more into the lumbar.
On another note, back bends are energizing. (Could that be why young children are full of energy while adults easily feel lethargic?) Keep this in mind while practising and if you want good sleep, don’t do back bends at night.
6. Warm Up
This is the most important thing – only attempt back bend poses AFTER warming up enough, like after half an hour of Vinyasa practice. Your body needs to warm up or else you’ll get injury. Also warm up the spine specifically with smaller back bends before attempting the deeper ones. The process should be progressive, not hasty.
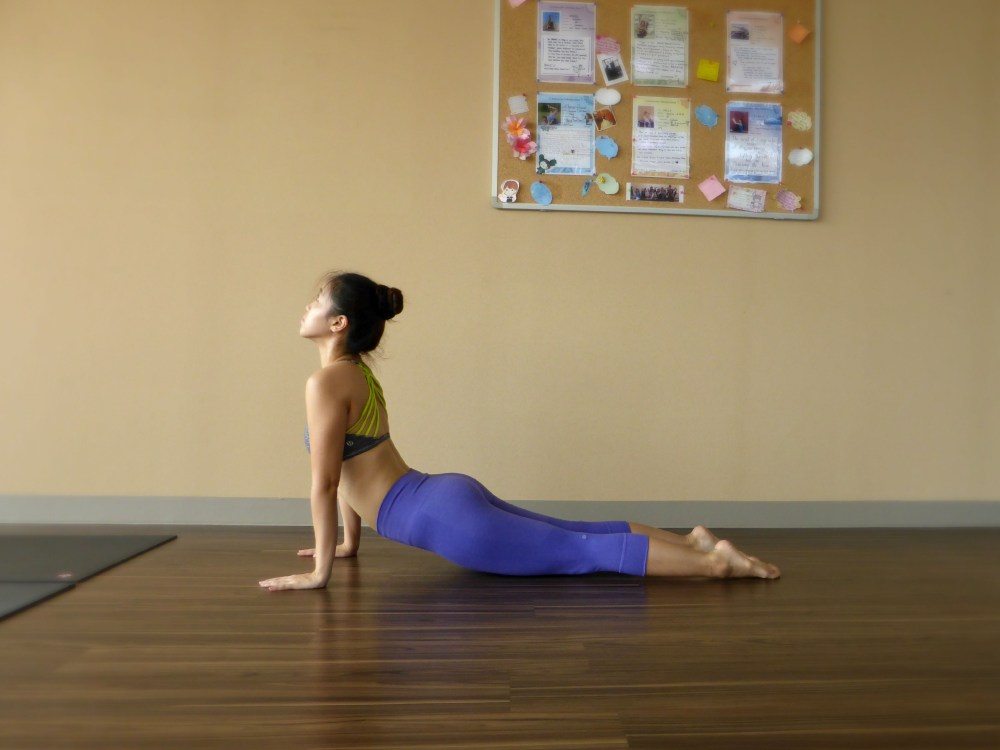
Upward Facing Dog
Difficulty: 1/5
This is a very basic pose you’ll encounter in every yoga class. The key is to open your chest outwards, shoulders back, and that is a mild upper back bend.
For absolute beginners, do a cobra which is the same but with hips and thighs on the floor, and elbows bent, using the back strength rather than arm strength.
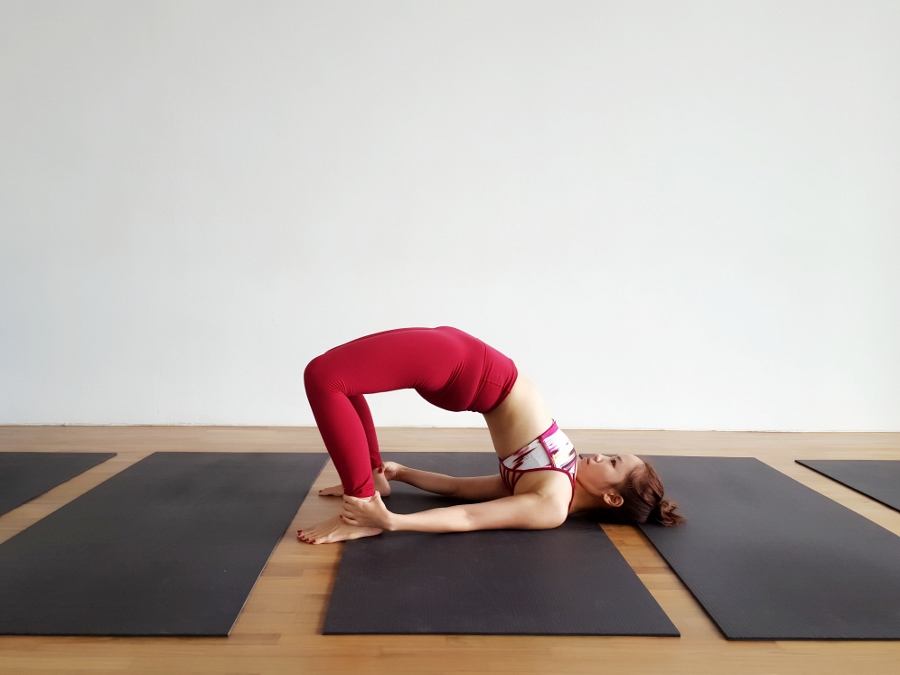
Bridge Pose
Difficulty: 1.5/5
This pose is often done to prepare for wheel pose, but I find that this pose is great for strengthening the hamstrings, quads and hip flexors and should be done on it’s own too..
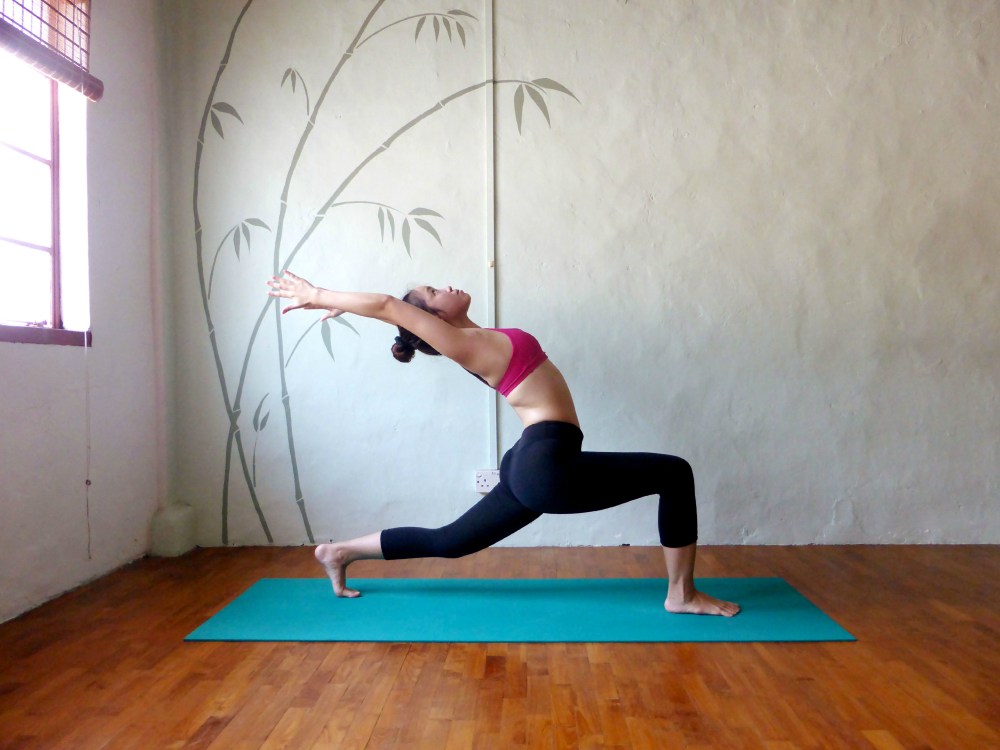
Lunge with back bend
Difficulty: 2/5
I hate this pose not because of the back bend but because of the back quads feeling like they’re going to rip apart. Adding a back bend just makes breathing more difficult and that increases the discomfort of staying in this pose.
For beginners, low lunge with knees on the ground to concentrate on the back bend. Remember, keep chest open and tailbone tucked in.
Unsupported back bend
Difficulty: 2.5/5
This is the pose you do during Bikram classes during the half moon series. They’ll tell you your back is supposed to hurt and you must go all the way back, looking at the floor behind you. I used to think that’s just said for fun, until one day I really saw the floor behind me. In a hot room, your flexibility is not the normal range hence it may be possible. In non-hot environments, you need to be more careful and don’t be too ambitious. This is also a pose which prepares for drop back to wheel pose – something I consider as 5/5 difficulty because your thighs must be very strong and stable to resist gravity so you won’t collapse.

Camel Pose
Difficulty: 3/5
It is harder to drop back together with both arms so you can reach for each feet one by one. This was quite accessible for me except for my very first Bikram class. Again, opening the chest is key here, and allow your neck to hang free.
Wild Thing
Difficulty: 3.5/5
I often see newcomers struggling with this one, looking nothing like a wild thing. Your chest should face upwards as much as possible, and if you are open enough, you can touch down into a wheel. To deepen this post, shift your torso towards your arms (your arms will be looking more vertical that way) and that will increase the bend. Balance and coordination (when you flip into the pose, land the toe down and change the direction of your grounded foot) is involved too, hence the increased difficulty. I find this pose quite deep in opening the chest, and I do not really like the feeling of that. But I guess that’s where tightness is.
For beginners, just try. You’ll get there.
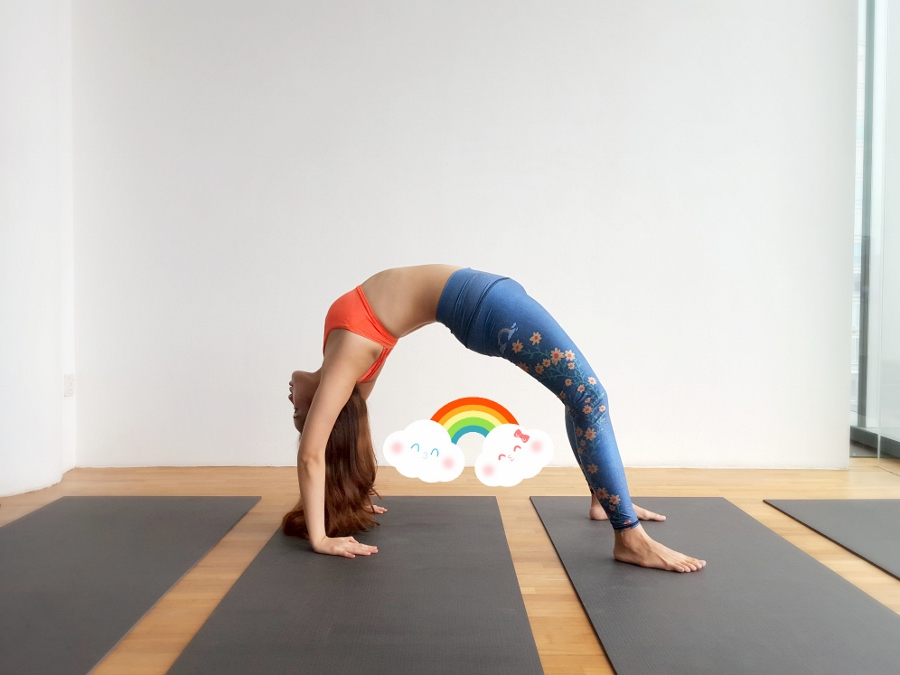
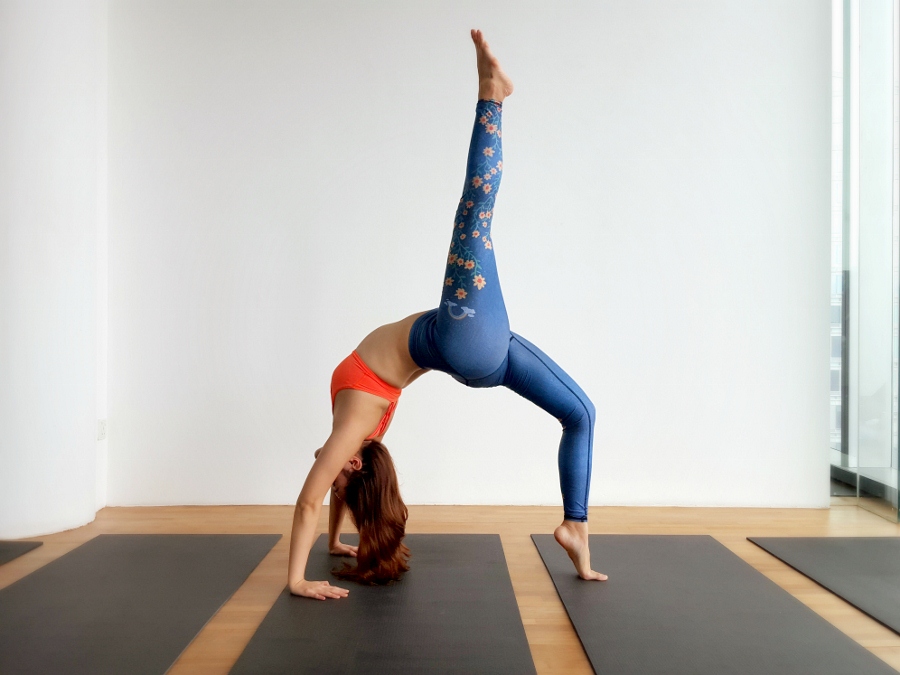
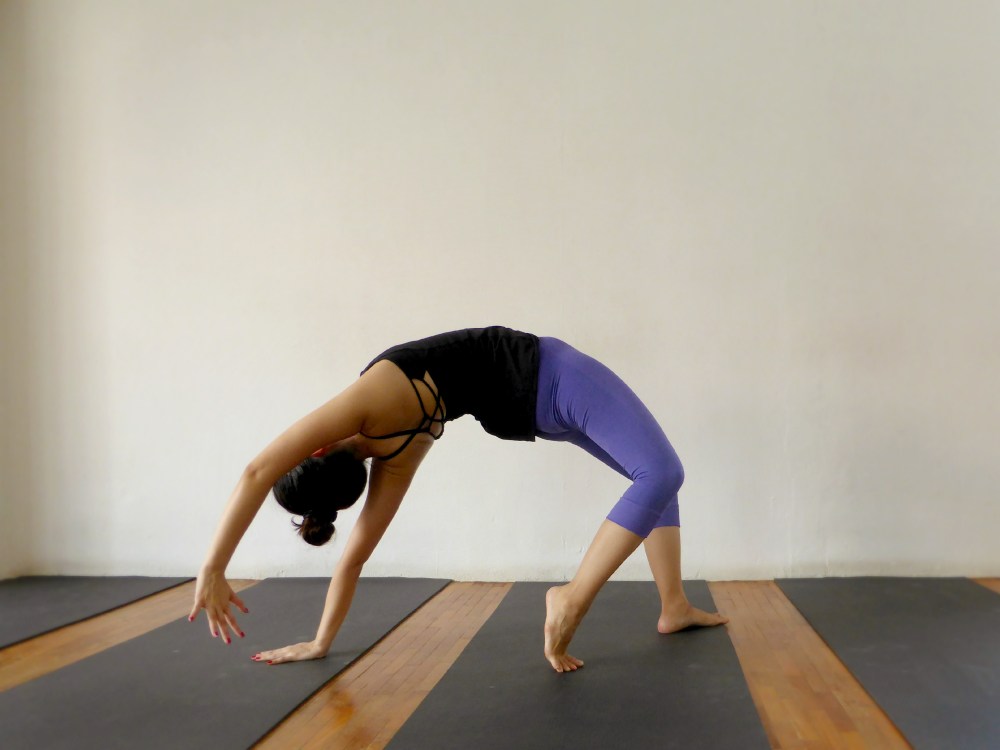
Wheel Pose
Difficulty: 4/5
Comparing to bridge pose (which I gave 1.5/5), wheel pose is way deeper and with variations like having the leg up it’s a bigger challenge (4.5/5). Only after lots of chest opening, thigh strengthening and shoulder opening could I get into what it looks like today. My progress of this pose is documented here. The back bend was deeper when I shifted my torso towards the right side, making my arms more vertical.
Heels up gives more space and is “cheating” because my leg can’t go vertically upright with heels down because something is still in the way.
For wheel pose, having legs straight will give more opening to the chest and more backbend occurs. Another variations is where you have knees bent and less opening of the chest – this one prepares you for walking your hands and feet closer to each other. Eventually, they may touch and that’s the ultimate back bend (5/5).
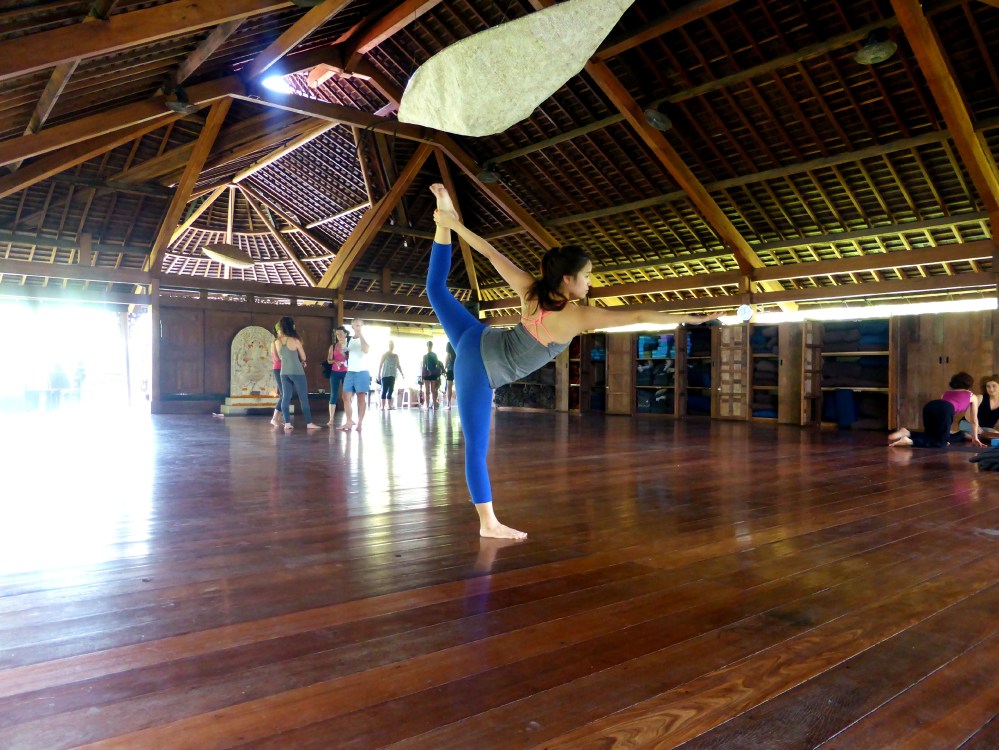
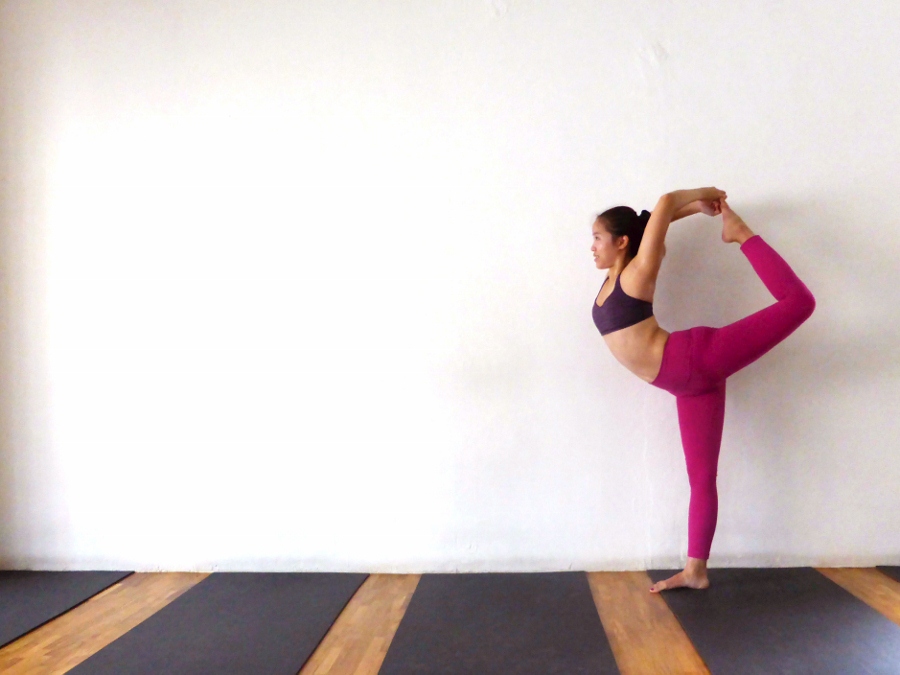
Standing Bow Pulling Pose
Difficulty: 4/5
This is not simply balancing on one leg with hand grabbing the other. You need to kick the back leg as much as possible and that’s where the back bend starts.
I used to hate this pose a lot because my breathing is restricted in this and I have to maintain balance. There’s a lot of focus involved. It looks like leg flexibility but it’s actually all back bends here. The aim is to have torso parallel to the ground while back leg goes as high up as possible. It’s easy to crush into lower back for this one, so remember to activate your other areas too like legs and chest. It’ll be good to try keep the body squared because this is required if you want to flip the grip into a King Dancer’s pose.
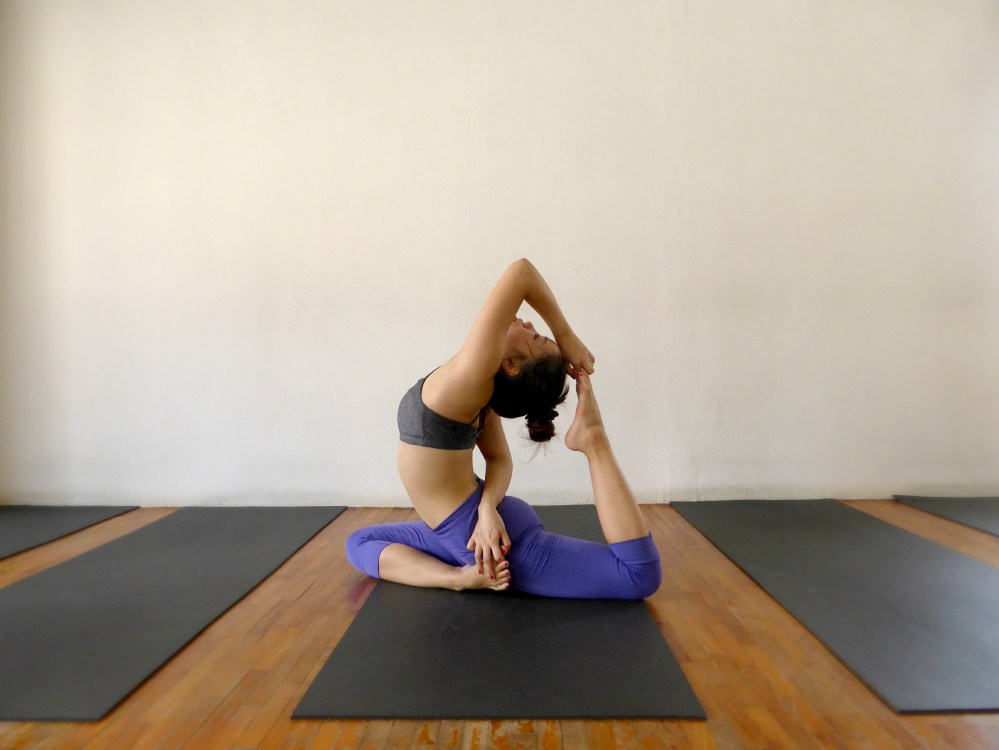
King Dancer’s Pose
Difficulty: 5/5
This only came to me with a lot of shoulder opening because my bones were in disfavour of this pose! It was so hard for me to achieve this. Here’s why:
1. Lumbar extension -this is inborn in you, you can’t change it. For most people they’re lumbar can bend around 90 deg. Some gifted people can bend to a smaller angle, while some people like me, has lumbar extension of more than 90 degress. Hence I have to work harder on other areas to compensate this.
2. Arm and leg length – those with very long arms will obviously be able to reach back easier than those with relatively short limbs compared to their torso. I happen to have short arms so it was tough.
However, the body has other segments which work can be done on to improve. I had to compensate it with:
3. Legs – Strength on thighs as well as squared hips to bring the leg up will bring my foot closer to my hands.
4. Shoulders – My shoulder had to open backwards A LOT for this pose. This movement on the shoulder is called flexion. Some teachers call this action as bending the upper back, but really it is all about bringing the shoulders backwards.
Of course, another aspect of this pose is to be able to balance this structure on one foot. This is something you need to train up as well, and the previous standing bow pose is good for this.
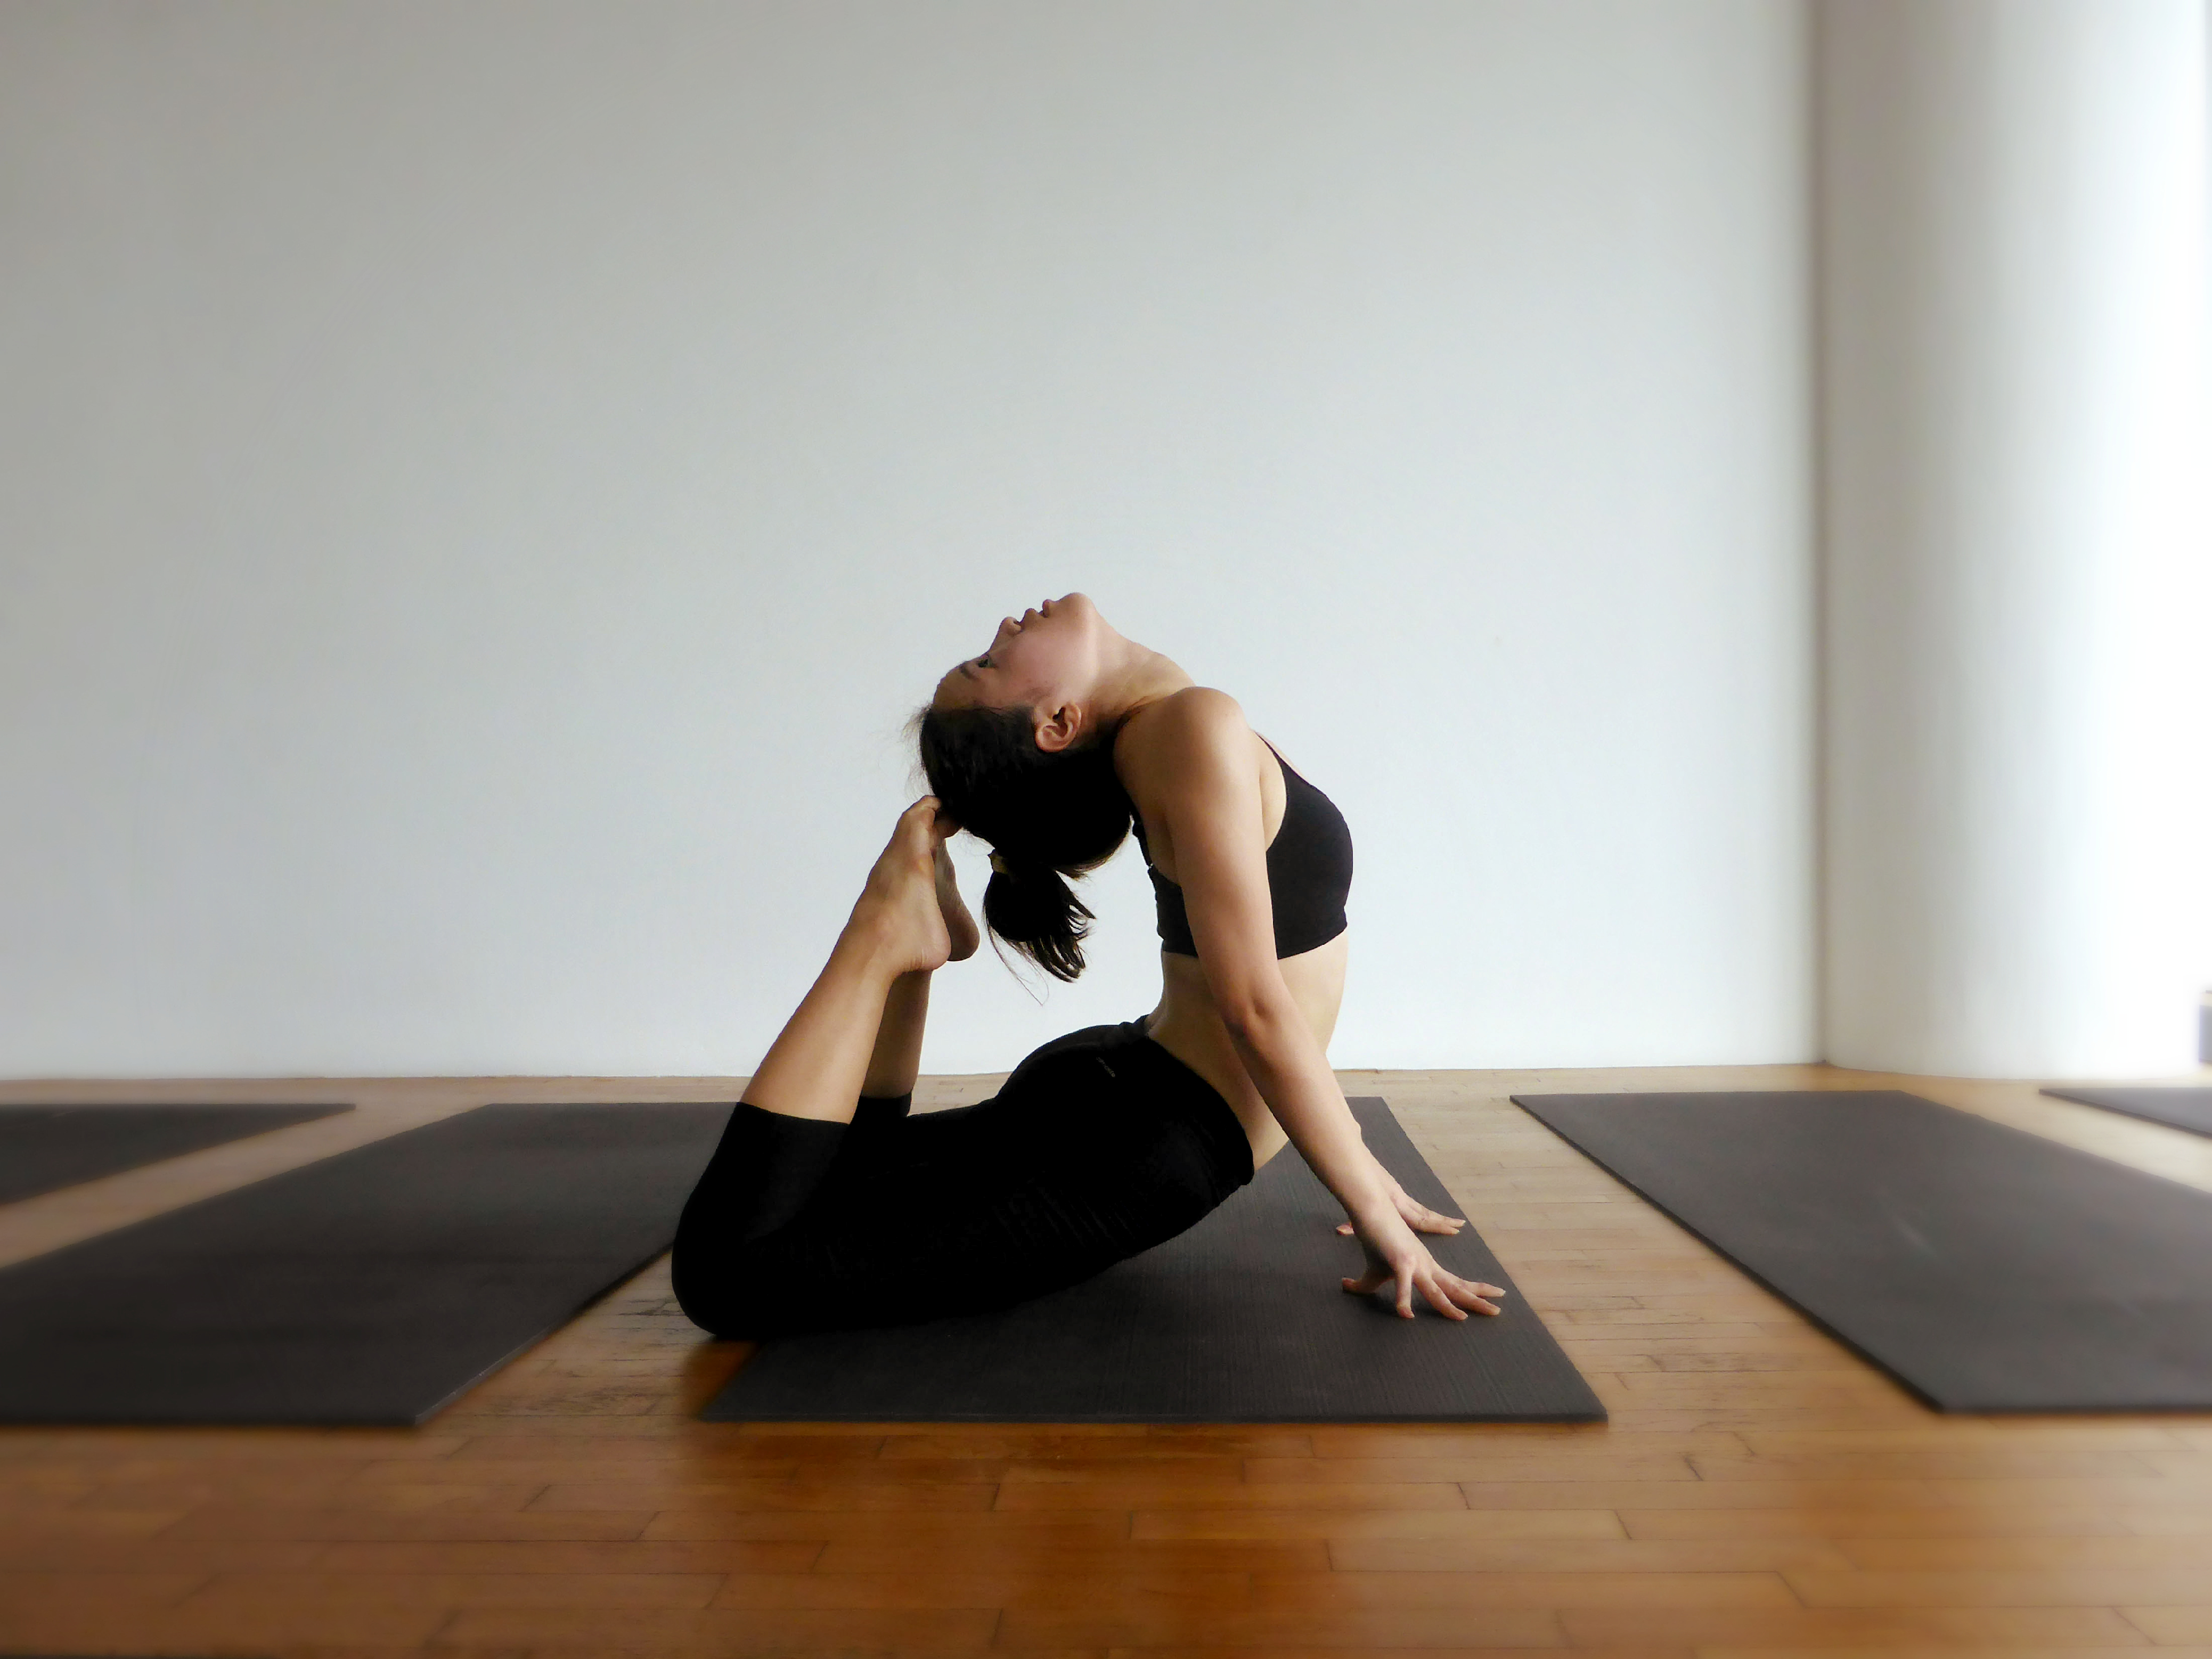
King Cobra
Difficulty: 4.5/5
This is not accessible to me unless I have ample warm up with poses leading to this final pose. You just need to keep trying other back bends and this will come eventually. I only managed this with the guidance of my yoga teacher through an hour of Hot Flow working towards this pose. I can’t get remotely near without any warm up. For this pose, we need the pelvic and upper thighs to be on the ground as much as we can. This is where thigh strength comes in place.

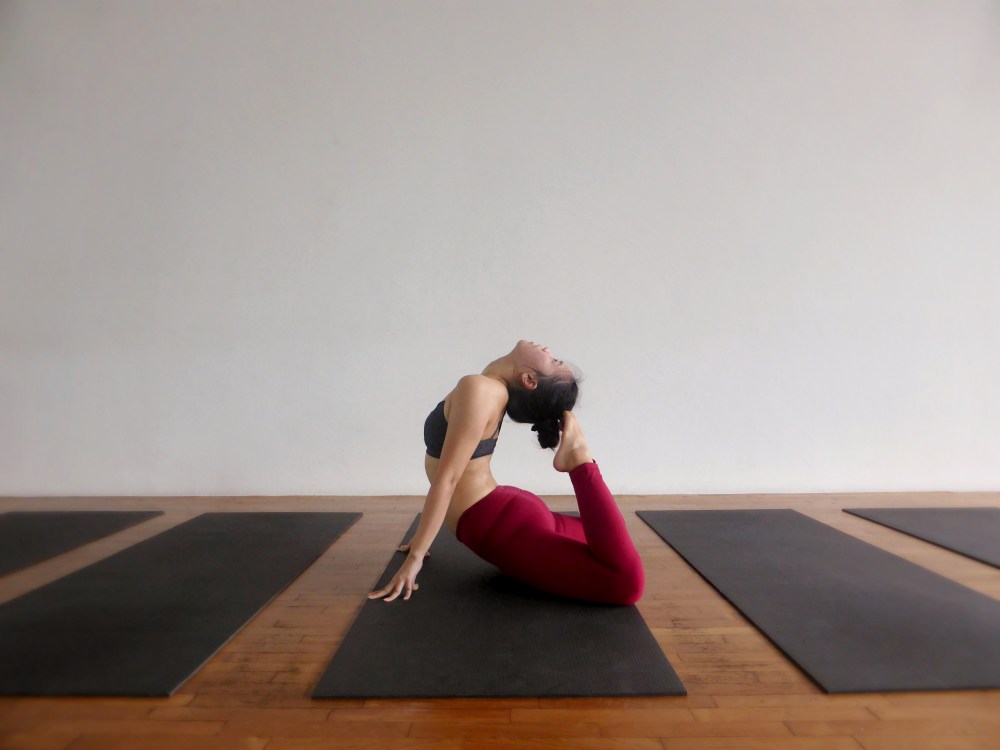
King Pigeon
Difficulty: 4.5/5
This is more difficult than others because of the arms – in flipped grip. You need to open the chest a lot in order to reach the arms back. My version in the first picture is modified but for the usual version, reach both arms back.
For the second picture, I did so with lunging legs and I feel it is deeper. I had to open my chest repeatedly to get my shoulders back, bending as much as I could from my upper back.
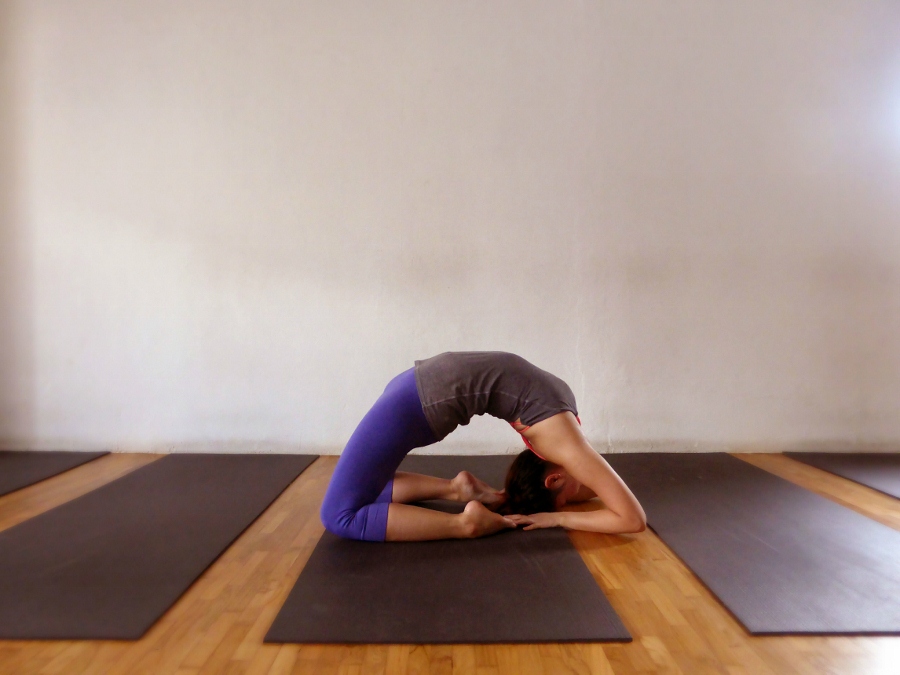
Kapotasana
Difficulty: 5/5
A deeper version from camel where the elbows reach the floor. I only managed this after 3.5 years of yoga! This is my second deepest backbend till date, with the other being a drop back which I attempted once, assisted. This is not the full version yet. I still need to work on touching my heels with my hands. This pose requires strength in your thighs to hold up the back bend bend. Shoulder flexibility is also important, if not the lumbar will need to bend a lot to get down. Those with open shoulders and chest as well as strong thighs AND a lumbar that can bend a lot, can aim for hands to reach the back of knees.
