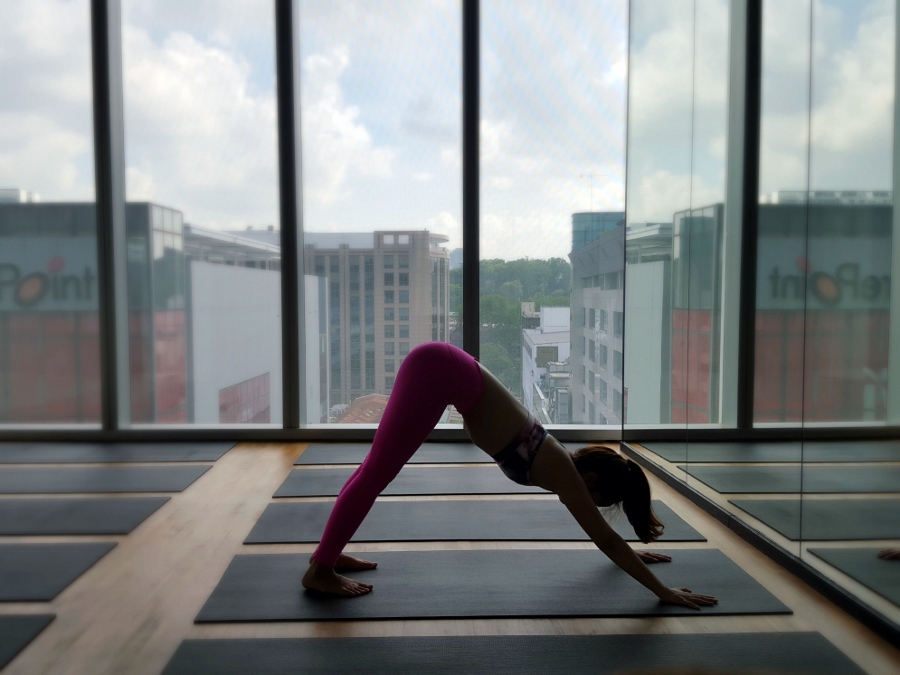
Downward facing dog, also known as Adho Mukha Svanasana or Parvatasana (mountain pose, in traditional sun salutations) is a pose you’ll encounter in almost every yoga class, unless you’re doing Bikram yoga.
When I was new to yoga (and new to any physical activity, which means I had no muscles strong anywhere), I really hated this pose. When the teacher told us that this pose was our break, I could not understand which part of it felt like resting! I know many people feel the same way too. I shall explain why:
Flexibility and strength
I did not start out yoga as a very inflexible person, being able to touch my toes from the beginning, but I started out without any strength. I can only imagine that people who had none of both flexibility and strength would really suffer in this pose.
To get into an inverted V is easy, but for this pose we need to touch the back of the heels down on the mat, or at least make the conscious effort to pull our heels down. For this pose, we want to evenly spread our body legs on all palms and feet, and in order to give weight to the feet we need to ground our feet down. If your feet are not grounded, you will feel a lot of effort coming from your shoulders and arms and this was the feeling I really hated!
As I mentioned, I started yoga with little strength, so I struggled to hold in this pose with all weight going to my arms which ached so much when I attempted to hold it. It took so much effort to stay in this pose, and this is why I hated doing sun salutations of any kind (be it traditional ashram style or Ashtanga style Sun A, B and C).
As a beginner, it did feel impossible that my feet would ever land down one day, since it felt so painful on my hamstrings and calves (and that’s coming from a person who can already touch their toes in forward fold). But with some divine intervention, it did come with practice and within months my both feet landed down comfortably. Suddenly the downward dog felt SO MUCH lighter. I felt a lot less strain on my shoulders and arms to hold in this pose. It did not become a rest pose because it still took some strength work from my arms, but it shows how loosened hamstrings can make a big difference for this pose.
Today, after gaining arm muscles making me look like a man (ok, not really, but you get the drift of how much difference in strength I have) downward dog has become effortless and pretty much a resting pose. Those teachers weren’t lying.
How to get into downward dog
- Start on your all fours, table top position, knees and feet hip width apart and toes can be tucked under, palms directly below your shoulders at shoulder width apart while spine is kept straight. This should be your stance for downward dog, based on your own body’s proportions.
- In the table top position, you can do a few rounds of cat and cow, arching your back with belly sucking into the spine, and then sinking belly down towards the mat, head looking up – just to loosen up the spine preparing you for your pose.
- Do not move the position of your hands and feet and next you gently ground your feet down and lift your knees up. You are in an inverted V position. Spine should be kept neutral.
- Here you try to grip the mat with your fingers which are spread out, spreading your weight on all 10 fingers with palms firmly grounded.
- Aim to ground your heels down, stretching out the hamstrings.
- To feel stronger in this pose, rotate your elbows slightly inwards rather than having it flared out and this pose will take more effort. Feel your heels pulling firmly into the ground more more stretch onto the back of calves.
Anatomy of downward dog
Downward dog is a pose which offers a stretch to the back. By stretch it means that the spine is in flexion (forward bend), not extension (back bend). We do not sink and arch our lower back in this pose at all. Doing this will only give strain and no benefits. We also do not want to round our back a lot, just keep it neutral.
This pose involves a lot of muscles in the body. Both strengthening and stretching will happen.

Diagram by Leslie Kaminoff
Stretch (muscle lengthening):
- Latissimus dorsi – commonly known as ‘lats’, the large muscle of the back) and the
- Hamstrings – muscles and tendons behind the thighs starting from buttocks
- Gluteus maximus – one of the muscles on the buttocks
- Gastrocnemius – muscles at back of calves
Strengthening and stabilizing (muscles contracting):
- Triceps – back of upper arms
- Deltoids – muscles at top of arms, covering shoulders
- Serratus anterior – muscle in front of the body, covering your ribs starting below armpits
- Quadraceps – commonly known as ‘quads’, the muscles on the front thighs
In fact, it could also involve more muscles! Just to name a few:
Stretching: rhomboid, teres major, trapezius, pectorals, soleus
Strengthening: psoas, dorsi flexor, tensor fascia latae, infraspinatus, teres minor
There are more muscles involved actually. Basically this pose will work your whole body and is a very good pose to kick start your yoga.
