King of all yoga asanas
Headstand is a popular yoga asana (pose) which is known to be the king of all asanas because of the benefits it brings to the body.
Often this pose is not understood properly, benefits not clearly explained. As with all inversions, being upside down will let healthy blood flow into the brain and relieve buildup of fluid ion the legs. But what sets headstand apart from other fancy inversions like handstand, forearm stand or chin stand is that only in headstand, you can compress and massage on the pituitary and pineal glands on the head. These endocrine glands are important for functions in the body. A variation of headstand – tripod headstand, will work as well, since the crown of the head is on the ground. This is the only pose which can stimulates these glands.
People who are unfamiliar with yoga may think that this pose is just done because it looks acrobatic, challenging, cool and all sorts of aesthetic reasons. People may think it’s a sign to show how advance they are, but no. This pose means a lot more than these superficial reasons.
Contrary to the looks of it this pose is not advanced at all! It just requires 3 things.
1. Finding the exact position of crown of head
This sounds super easy, but really, I won’t get the position by randomly placing my head on the mat! For those with poor estimation skills, using your own palm to measure the distance helps a lot. Simply place the base of palm between your eyebrows and whole palm pastes down on your forehead. The position where the middle finger ends on is your crown. You must use your own hand because everyone’s proportions are different. That said, did you know that palm size and head size is relative? I didn’t realize earlier!
Once this position is found, the pose will be safe on the spine and basically the pose will happen (even if you don’t lift up your legs).
Do not attempt to go further if you’re at the wrong position. You will know it’s the wrong spot when you feel strain in your neck. Be mindful and do not force yourself. Take a step back, reset the position, and try again.
2. Core strength
This has to be built over time for people who start off unfit, no rushing. For those who already have strong core but are new to yoga, headstand will be no challenge to you. Core is what’s going to hold you up. Ability to hold stably in headstand is basically core work.
Suggested yoga poses and dynamic movements to build core strength:
- Boat pose (navasana) – high and low
- Plank/ forearm plank pose – hold for 1 minute
- On all fours – one knee to elbow, opposite elbow, chin, forehead, wrists
3. Courage and faith
To trust that you’re not going to die here. Basically if you have 1 and 2, you just need this last point. And this last point, is the hardest to grasps.
Before straitening my knees, I always feel the fear due to uncertainty about what’s going to happen – am I going to be able to hold today or will I flop back?
If you break down the challenges in headstand, you’ll see that it’s not an advanced pose. It doesn’t require much openness/ flexibility anywhere and it’s not tiring on arms or legs. It’s quite weightless to hold here in fact, once you find your crown of the head!
Newcomers to yoga can actually try this once they have point 1 and 2. It’s just point 3 that’s harder to work on. Courage also refers to being able to try inversions away from the wall, and the courage to be able to fall (which I have not tried, not even once. I’m not into roller coaster rides – the feeling of falling is about the same. One where you are afraid as hell even though you know you won’t die.)
Personally, I took a few years to get this. Some people get it within months or even weeks! I did not start of having any core muscles at all, so it was a slow process of building strength. I also didn’t know where my crown was and have been using wrong spots and felt strain in my neck when it happens.
Now that I understand how this pose works, I hope this explanation will be useful for those who have yet to find their headstand.
Getting into headstand (my way)
1. Start with yoga mat close to the wall.
2. Find crown of your head by measuring with your palm. Remember that spot.
3. Get down on your shins and knees something like a child’s pose, and place opposite palms on opposite elbows, on the mat, about 40 – 50cm away from the wall, more if you’re tall with longer arms. With elbows in position, extend palms out and interlace your fingers. You’ll get a triangle. At all times do not move the elbows. The interlaced fingers should be at least 10cm away from the wall.
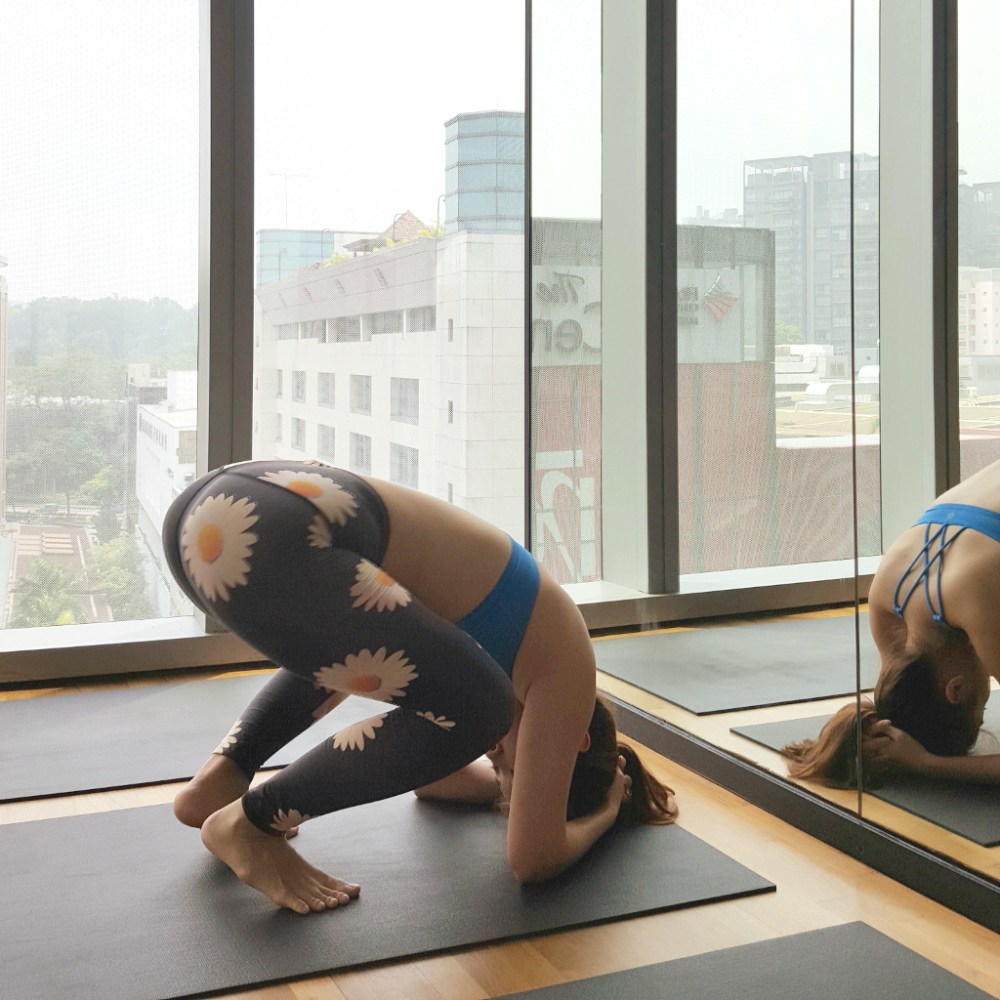
4. Place crown of head down onto the mat and back of head should rest nicely against the inside of interlaced palms. That’s the head position. Do not move it.
5. Slowly lift knees up stepping into something like a downward dog. Without head and arms moving at all, walk your feet forward as close as possible. As you move forward, your whole torso will shift vertically over your head. Even with feet still on the ground, that’s your headstand. Your head and neck should feel stable here, if you got the right spot for crown of head.
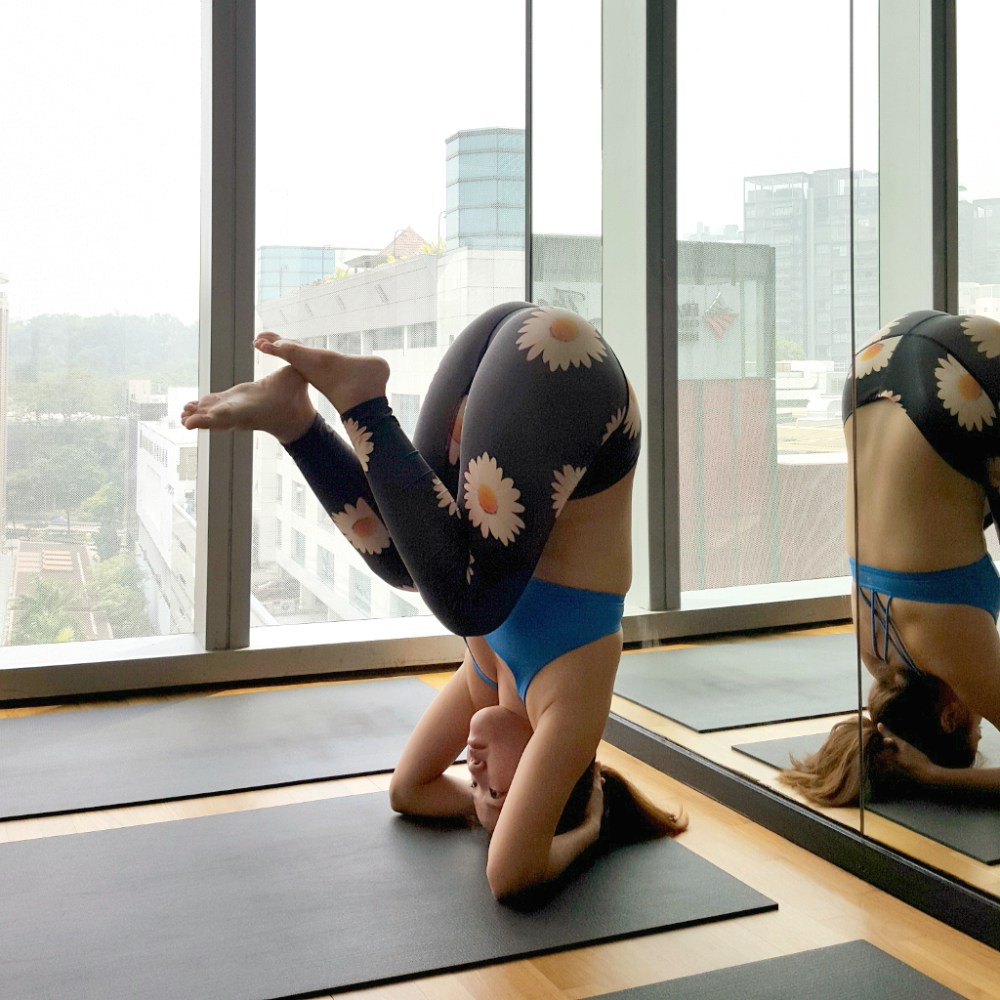
6. Only if your torso is vertically above the head and neck, try to lift one foot off bending foot towards butt, other foot off, and if core is engaged and strong, both feet can lift off with knees bent towards your chest.
7. Engaging the core, bent knees can lift up higher away from your. As this happens, your hips and butt will shift backwards a bit. It’s normal.
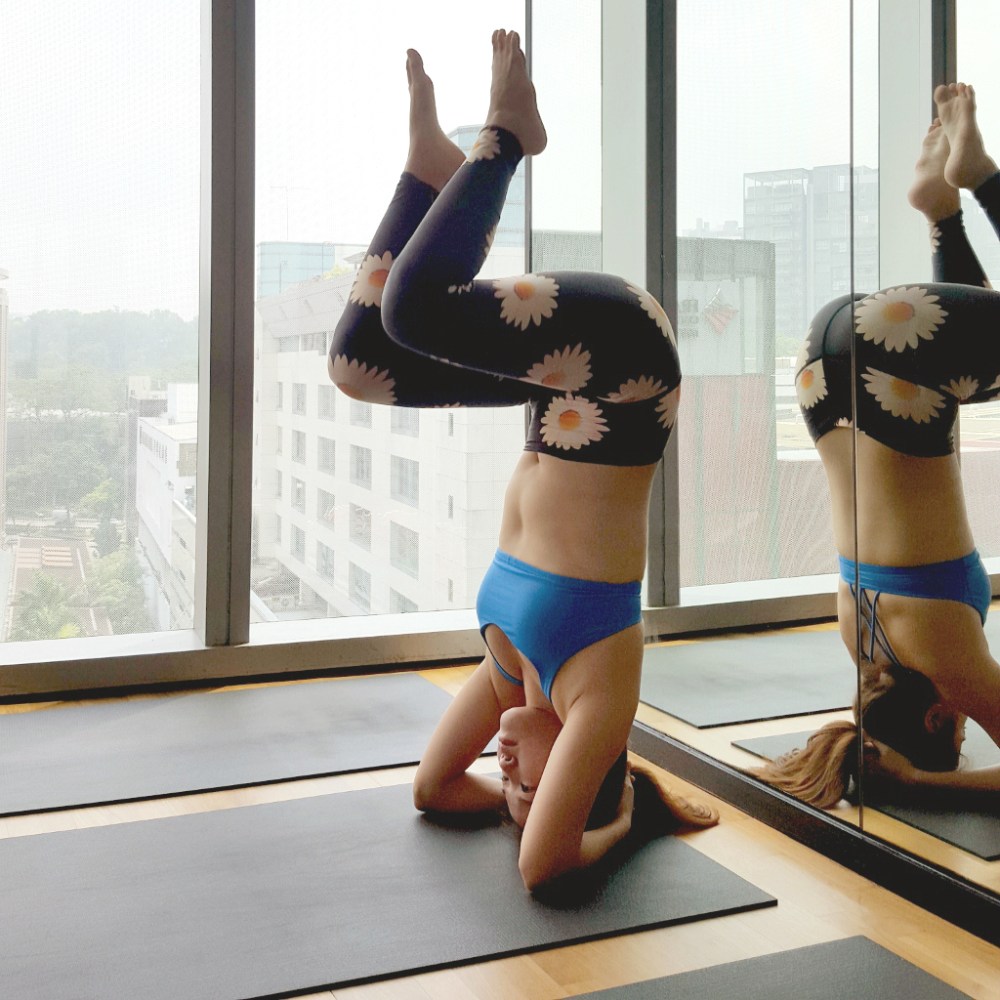
8. This is the part which requires courage – trust your body and with core engaged, straighten both knees up towards the ceiling. Your feet or one foot may touch the wall if you lose balance but with core strength, try to get it off and maintain a straight line.
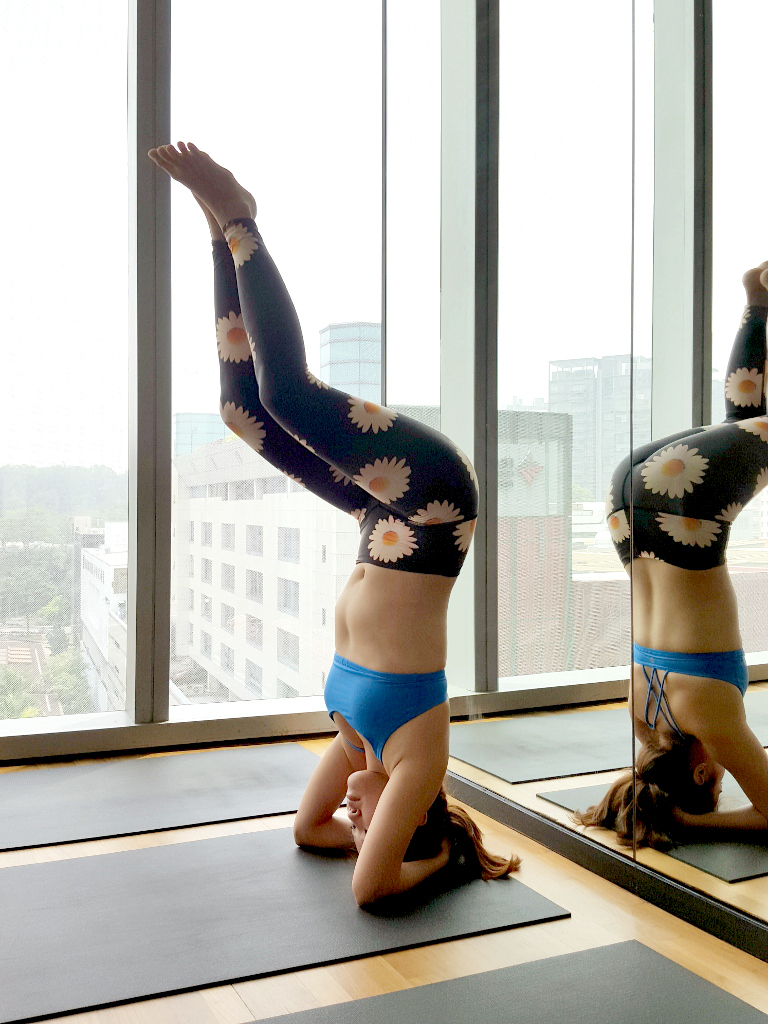
 9. Take your time to straighten yourself up, do not swing up or you may lose balance.
 10. Stay as long as you can in the headstand. Remember to breathe.
https://www.instagram.com/p/BEFh7Q7HvL6/?taken-by=orrrrange
To exit, you can bend both knees towards you and try to come down the way you came up. Do it slowly and in a controlled manner.
Important things to note:
So what happens when you fall? Well you won’t die… if you fall properly. Always unlock your hands and round your back, curling like a ball as you roll back. You won’t sustain injuries this way.
There are other methods to get into headstand, like lifting one leg straight up, touching the wall, and the other leg follows – this one requires flexible hamstrings. My recommended method is something that even people with tight hamstrings can try and I personally feel more engagement of core this way, making my pose stronger, rather than depending on flexibility. I also find it harder to get off the wall with the flexible method.
I also do not recommend kicking up in this pose. If your core strength is strong enough to lift both knees up at the same time, it’ll indicate that your core is strong enough to hold you in the pose. You need the engagement of the core to hold up and not collapse and create pressure on the neck or shoulders. Only try this pose after you have gained some strength.
People with high blood pressure, back or neck injuries or sufferers of headaches may want to skip this pose, until their ailments have been fixed. Benefits of yoga poses only applies to those without the preexisting problems.
There are many claimed therapeutic applications to this pose and that’s up to the individual to experience.
I hope my explanation of headstands makes it sound less unattainable than it looks. Try not to do it at home if you’re new to this. It’s best if you have someone to guide you along and you’ll be surprised with what you can do.
